AI Coding 時代的工程師工具鏈:TypeScript 型別、Cursor Rules、agent-skills

三個工具,三個層次:TypeScript 的嚴格型別讓 AI 生成的程式碼更準確、Cursor Rules 把你的偏好注入到 AI 的每一次輸出、agent-skills 把資深工程師的開發紀律直接植入 AI agent 的行為模式。把三個都裝上,AI 幫你寫的程式碼才算真的能用。
目錄+
AI 生成的程式碼不準確,通常有三個獨立的原因:型別資訊太模糊(AI 不知道你想要什麼)、偏好沒有記錄(AI 每次都在猜你的慣例)、開發紀律沒有約束(AI 找最短路徑,跳過 spec、測試、review)。三個問題,三個解法。
一、TypeScript:型別是給 AI 的說明書
你叫 AI 寫一個函式,它寫出來了,但型別全是 any。或者它用了 as 強制轉型,編譯通過了,runtime 卻爆掉。
問題不在 AI 不夠聰明,而是你的型別沒有給它足夠的資訊。TypeScript 的型別系統不只是給編譯器看的——它是你和 AI 之間的合約。型別越精確,AI 生成的 code 越可靠。
以下 10 個技巧,每個都附前後對比。
1. 用 satisfies 取代 as
// 之前:as 會吞掉型別錯誤
const config = {
  port: 3000,
  host: 'localhost',
  debug: 'yes', // 應該是 boolean,但 as 不會報錯
} as Config

// 之後:satisfies 檢查型別但保留推斷
const config = {
  port: 3000,
  host: 'localhost',
  debug: true,
} satisfies Config
// config.port 的型別是 3000(literal),不是 number
as 是告訴 TypeScript「我比你懂」,它會跳過檢查。satisfies 是「幫我檢查,但不要拓寬型別」。AI 生成 config 物件時,satisfies 能在編譯期就抓到錯誤。
2. const assertion
// 之前:型別被拓寬
const routes = ['/', '/about', '/blog']
// 型別:string[]

// 之後:保留 literal types
const routes = ['/', '/about', '/blog'] as const
// 型別:readonly ['/', '/about', '/blog']
as const 讓陣列和物件的值變成 literal type。當你把 routes 傳給接受特定字串的函式時,TypeScript 知道裡面只有這三個值,AI 也能根據這個資訊生成更精確的 code。
3. Template literal types
// 之前:手動列舉所有可能
type EventName = 'click_button' | 'click_link' | 'hover_button' | 'hover_link'

// 之後:用 template literal 組合
type Action = 'click' | 'hover' | 'focus'
type Target = 'button' | 'link' | 'input'
type EventName = `${Action}_${Target}`
// 自動產生所有 3×3 = 9 種組合
當你的字串有規律的命名模式時,template literal types 比手動列舉更不容易遺漏。AI 在生成 event handler 時,能自動推斷出所有合法的 event name。
4. Discriminated unions 取代 enum
// 之前:用 enum + 條件判斷
enum Status {
  Loading,
  Success,
  Error,
}
interface State {
  status: Status
  data?: string
  error?: Error
}
// data 和 error 永遠是 optional,容易忘記檢查

// 之後:discriminated union
type State =
  | { status: 'loading' }
  | { status: 'success'; data: string }
  | { status: 'error'; error: Error }

function handle(state: State) {
  switch (state.status) {
    case 'success':
      console.log(state.data) // TypeScript 知道 data 一定存在
      break
    case 'error':
      console.log(state.error) // TypeScript 知道 error 一定存在
      break
  }
}
Discriminated union 讓每個 status 對應精確的 payload。AI 在 switch case 裡不會忘記處理某個狀態,因為 TypeScript 會用 exhaustiveness check 提醒它。
5. Branded types 防止 ID 混用
// 之前:所有 ID 都是 string,容易傳錯
function getUser(userId: string) { ... }
function getOrder(orderId: string) { ... }
getUser(orderId) // 不會報錯,但邏輯完全錯

// 之後:branded types
type UserId = string & { __brand: 'UserId' }
type OrderId = string & { __brand: 'OrderId' }

function userId(id: string): UserId { return id as UserId }
function orderId(id: string): OrderId { return id as OrderId }

function getUser(id: UserId) { ... }
function getOrder(id: OrderId) { ... }
getUser(orderId('abc')) // 編譯錯誤
Branded types 在 runtime 沒有成本(__brand 不存在於實際值),但在型別層面區分了不同意義的 string。AI 生成 API call 時不會把 orderId 傳進 getUser。
6. Utility types 的正確時機
// Partial:建立 update payload(所有欄位選填)
type UpdateUser = Partial<User>

// Required:強制所有欄位必填(例如 form 驗證後)
type ValidatedUser = Required<User>

// Pick:只取需要的欄位
type UserPreview = Pick<User, 'id' | 'name' | 'avatar'>

// Omit:排除敏感欄位
type PublicUser = Omit<User, 'password' | 'email'>
原則:Pick 用在「我只要這幾個」,Omit 用在「我全都要,但排除這幾個」。欄位少的時候用 Pick,排除少的時候用 Omit。告訴 AI 你的 API response 長什麼樣,它就能生成正確的 data fetching code。
7. infer 關鍵字
// 從函式的回傳值推斷型別
type ReturnOf<T> = T extends (...args: any[]) => infer R ? R : never

// 實際用法:從 API handler 推斷 response 型別
type ApiResponse = ReturnOf<typeof getUserHandler>

// 從 Promise 裡解包
type Unwrap<T> = T extends Promise<infer U> ? U : T
type User = Unwrap<Promise<{ id: string; name: string }>>
// 型別:{ id: string; name: string }
infer 讓你在 conditional type 裡「捕捉」某個位置的型別。當你的 API 層已經有完整的函式定義時,用 infer 自動推斷回傳型別,比手寫 interface 更不容易出錯。
8. Function overloads
// 之前:union type 讓回傳值不精確
function parse(input: string | number): string | number { ... }

// 之後:overload 讓每個 input 對應精確的 output
function parse(input: string): number
function parse(input: number): string
function parse(input: string | number): string | number {
  if (typeof input === 'string') return parseInt(input, 10)
  return String(input)
}

const a = parse('42')  // 型別:number
const b = parse(42)    // 型別:string
Overloads 讓同一個函式根據 input 型別給出不同的 output 型別。AI 在呼叫 overloaded function 時,能根據傳入的參數自動推斷回傳值,不需要手動 assert。
9. Zod 做 runtime validation
import { z } from 'zod'

// 定義 schema(同時是 runtime validator 和 type)
const UserSchema = z.object({
  id: z.string().uuid(),
  name: z.string().min(1),
  email: z.string().email(),
  role: z.enum(['admin', 'member', 'guest']),
})

// 自動推斷 TypeScript 型別
type User = z.infer<typeof UserSchema>

// runtime 驗證(API 邊界、form input)
const result = UserSchema.safeParse(apiResponse)
if (result.success) {
  console.log(result.data.name) // 型別安全
} else {
  console.log(result.error.issues) // 結構化的錯誤資訊
}
TypeScript 只在編譯期檢查,外部資料(API response、user input、webhook payload)需要 runtime validation。Zod 讓你用一份 schema 同時產生型別和 validator,AI 生成的 API integration code 如果用 Zod,就不會漏掉邊界檢查。
10. 型別測試
// 用 @ts-expect-error 做型別層面的斷言
type Assert<T, Expected> = T extends Expected ? true : never

// 確認型別推斷正確
type _test1 = Assert<ReturnOf<typeof getUser>, Promise<User>> // 通過
// @ts-expect-error — UserId 不能指派給 OrderId
const _test2: OrderId = userId('abc') // 這行「應該」報錯
型別測試確保你的 utility types 和 generic functions 在重構後仍然正確。如果你改了 User 型別,@ts-expect-error 會在預期的錯誤消失時提醒你——代表某個型別約束被意外放寬了。
這 10 個技巧的共同點:它們都在增加型別的資訊量。satisfies 比 as 多了檢查,branded types 比 plain string 多了語意,discriminated union 比 optional fields 多了狀態關聯。AI 模型讀你的 codebase 時,型別就是它最重要的上下文。
二、Cursor Rules:把你的偏好寫進 AI 的默認行為
你用 Cursor 寫了三個月的 code,每次開新 chat 還是要重新解釋:「我們用 Next.js App Router」「不要用 default export」「CSS 用 Tailwind 不要寫 inline style」。
這不是 Cursor 笨。是你沒告訴它規則。
Cursor Rules 是 Cursor 最被低估的功能。它讓你把專案的上下文、慣例、禁止事項寫成一份文件,AI 在每次對話中都會自動讀取。寫好 Rules,等於幫你的 AI 助手做了一次完整的 onboarding。
新舊格式:.cursorrules vs .cursor/rules
先搞清楚兩種格式的差異,因為很多網路教學混在一起講。
舊格式:.cursorrules
專案根目錄放一個 .cursorrules 檔案,寫什麼都行,Cursor 會在每次對話時自動載入。簡單粗暴,但有明顯限制:只能有一個檔案、沒有條件載入、內容一多就變成垃圾場。
新格式:.cursor/rules/
2025 年底 Cursor 推出的新系統。在 .cursor/rules/ 目錄下放多個 .mdc 檔案,每個檔案有 frontmatter 可以設定:
---
description: TypeScript coding conventions
globs: **/*.ts, **/*.tsx
alwaysApply: false
---

- 使用 named export,不用 default export
- 優先使用 interface 而非 type
- 錯誤處理使用 Result pattern
關鍵差異:
- 多檔案:你可以按主題拆分(coding style、架構規範、API 慣例)
- globs:指定這條 rule 只在特定檔案類型生效
- alwaysApply:設為
true時每次對話都載入,設為false時只在符合 globs 的檔案被編輯時才載入 - auto-attach:Cursor 會根據你正在編輯的檔案自動選擇相關的 rules
建議:直接用新格式。舊的 .cursorrules 還能用,但新格式的組織能力完全不在一個級別。
為什麼 99% 的人沒寫好 Rules
三個常見問題:
第一,太空泛。 「寫乾淨的 code」「遵循最佳實踐」——這種 rule 等於沒寫。AI 需要的是具體的、可執行的指令。不是「寫好的 code」,是「函式超過 20 行就拆分」「API response 統一用 { data, error } 格式」。
第二,太冗長。 有人把整個 coding style guide 貼進去,三千行。Rules 會佔用 context window,太長反而降低 AI 的理解品質。每條 rule 控制在一句話,整份檔案不超過 50 行。
第三,沒有分層。 把框架規範、業務邏輯、UI 慣例全部混在一個檔案裡。當 AI 在寫一個 API endpoint 的時候,它不需要知道你的按鈕圓角是 rounded-xl。用新格式的多檔案 + globs 來分層。
好的 Rules 包含什麼
一份有效的 Rules 通常涵蓋四個層面:
專案上下文 — 告訴 AI 這個專案是什麼、用了什麼技術、有什麼特殊的架構決策。
- 這是一個 Next.js 15 App Router 專案
- 後端使用 Supabase(auth、database、storage)
- 部署在 Vercel
- 使用 pnpm 作為套件管理器
- monorepo 結構,packages/ 下有共享模組
程式碼慣例 — 具體的寫法規定,越具體越好。
- 使用 named export,不使用 default export
- React 組件使用 function declaration,不用 arrow function
- 狀態管理用 Zustand,不用 Redux
- 資料抓取用 server component + fetch,不用 useEffect
- 樣式用 Tailwind utility classes,不寫 CSS modules
禁止事項 — 明確告訴 AI 什麼不能做。這往往比告訴它該做什麼更有效。
- 不要使用 any type
- 不要在 client component 裡直接呼叫資料庫
- 不要用 useEffect 做資料抓取
- 不要在 commit message 裡寫「fix bug」或「update code」
- 不要在沒有 loading 和 error state 的情況下做 async 操作
格式與結構 — 檔案怎麼組織、命名怎麼規定。
- 組件檔名用 PascalCase:UserProfile.tsx
- 工具函式檔名用 camelCase:formatDate.ts
- API route 放在 app/api/ 下,用 route.ts
- 共享型別放在 types/ 目錄
- 每個組件資料夾包含 index.ts 做 re-export
實戰範例:Next.js + TypeScript 專案
以下是一個實際可用的 rules 結構:
.cursor/rules/
├── general.mdc          # 專案上下文,alwaysApply: true
├── typescript.mdc       # TS 慣例,globs: **/*.ts, **/*.tsx
├── react.mdc            # React 組件規範,globs: **/*.tsx
├── api.mdc              # API route 規範,globs: app/api/**/*
├── database.mdc         # Supabase 查詢慣例,globs: **/db/**/*
└── testing.mdc          # 測試規範,globs: **/*.test.ts
general.mdc 設 alwaysApply: true,確保 AI 永遠知道專案的基本資訊。其他檔案透過 globs 自動匹配——你在寫 API route 的時候,api.mdc 會自動載入;寫測試的時候,testing.mdc 會自動載入。
進階技巧
Per-folder rules:在子目錄放 .cursor/rules/ 可以覆蓋上層的規則。適合 monorepo 中不同 app 有不同慣例的情況。比如 apps/blog/ 用 contentlayer,apps/docs/ 用 fumadocs——各自的 rules 各自管。
Description 要寫好:description 欄位不是裝飾。當 alwaysApply 為 false 時,Cursor 用 description 來判斷要不要載入這條 rule。寫清楚它的適用場景,比如「Rules for writing Supabase RLS policies」而不是「database stuff」。
定期維護:Rules 不是寫一次就不管了。每次你發現 AI 又犯同一個錯,就去加一條 rule。每次你發現某條 rule 從來沒生效,就刪掉或改寫。把它當成活文件。
Rules 的品質取決於你對自己專案的理解程度。如果你寫不出 rules,通常不是因為你不會寫——是因為你還沒想清楚自己的專案到底有哪些慣例。這個釐清的過程本身就有價值:它迫使你把隱性知識變成顯性規則,而這些規則不只幫 AI,也幫未來的你自己。
整理開發環境的同時,桌面 4 件套編輯選物(機械鍵盤、USB-C Hub、螢幕掛燈、站立書架)適合剛開始整理桌面的人,3,000 元以內的 CP 值組合。
三、agent-skills:把資深工程師的紀律裝進 Claude Code
AI coding agent 預設優化的是「完成」,不是「正確」。
它不會主動要你先寫 spec,不會堅持測試覆蓋,不會在你想偷懶跳過 security review 的時候說不。它會找最短路徑,把 code 交給你,然後你再花兩倍時間修。
agent-skills 要解決的就是這件事。
它是什麼
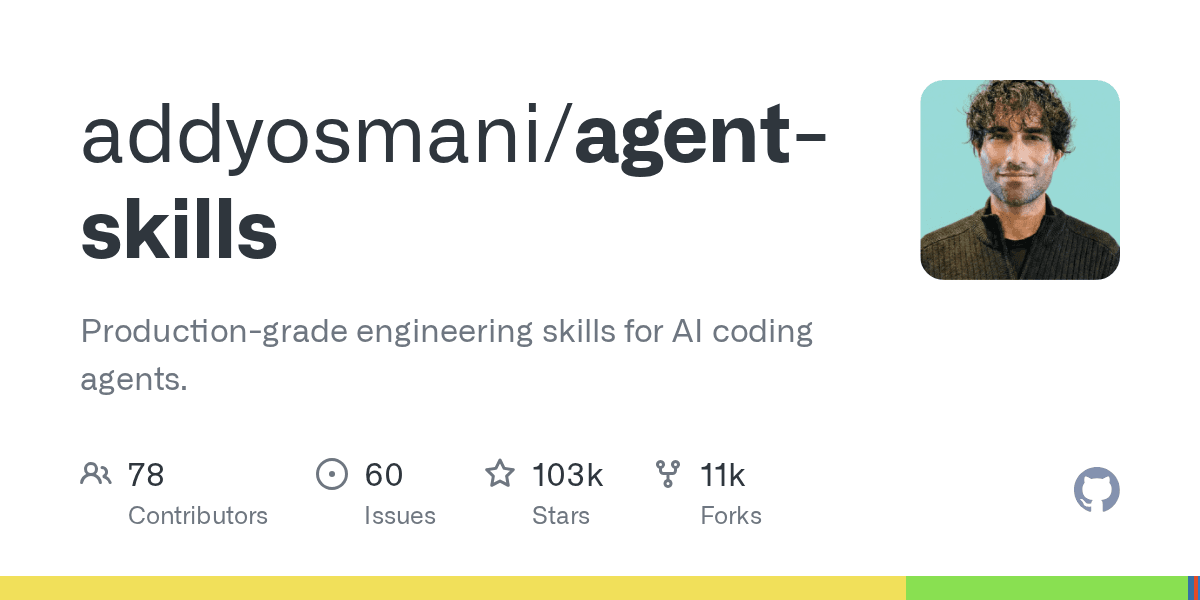
Addy Osmani 開源的 agent-skills 是一套 production-grade 的 AI agent workflow 框架,21k GitHub stars,2.6k forks。Osmani 是 Google Chrome DevTools、Lighthouse、Core Web Vitals 的前工程 lead,現任 Google Cloud AI Director,工程背景橫跨 25 年。
核心結構很簡單:20 個 SKILL.md 檔案 + 7 個 slash command,對應軟體開發的六個階段:
Define → Plan → Build → Verify → Review → Ship
每個 skill 不是「給 agent 看的建議清單」,而是有 step-by-step workflow、驗證 gate、反理由化表格的強制流程。README 裡的定位是:「Process, not prose. Skills are workflows agents follow, not reference docs they read.」
7 個 slash command
安裝後,你在 Claude Code 裡可以用這 7 個指令驅動整個開發週期:
| 指令 | 觸發的階段 |
|---|---|
/spec | 寫 PRD,強制在動 code 前定義需求 |
/plan | 把 spec 拆解成可驗證的任務單元 |
/build | 以 thin vertical slice 方式漸進實作 |
/test | Red-Green-Refactor,測試金字塔 80/15/5 |
/review | 五軸 code review,每次 PR 限制約 100 行 |
/code-simplify | 在不改變行為的前提下降低複雜度 |
/ship | pre-launch checklist + staged rollout |
20 個 skill 的設計邏輯
每個 skill 都有固定結構:Overview、When to Use、Process、Common Rationalizations、Red Flags、Verification。
「Common Rationalizations」這個欄位最有意思——它列出 agent(和人類工程師)常用來跳過某個步驟的理由,以及為什麼那些理由是錯的。比如在 test-driven-development 裡:
「我之後再補測試」→ 測試應該定義行為,不是驗證你已經寫的 code。
這個反理由化設計,是把人類 code review 文化裡「前輩回應新人藉口」的那個角色,直接寫進 skill 本身。
幾個值得關注的 skill:
source-driven-development:在做框架決策之前,agent 必須先讀官方文件,不能依賴訓練知識。這直接對應了 agent 常見的「我記得 Next.js 的 API 是這樣」然後用了三個版本前的寫法這種問題。
context-engineering:管理 agent session 的資訊輸入,確保 context window 裡有對的東西、沒有雜訊。這是一個很少有人明確思考但影響極大的層面。
deprecation-and-migration:把「code 是負債」的思維植入 agent——每次碰到舊 code 要問「這個還需要存在嗎?」而不是預設保留。
3 個 specialist personas:code-reviewer(Staff Engineer 視角)、test-engineer(QA 專家)、security-auditor(OWASP 評估)。可以在特定任務裡切換到這些角色。
安裝方式
Claude Code(推薦):
/plugin marketplace add addyosmani/agent-skills
/plugin install agent-skills@addy-agent-skills
Cursor:把任何 SKILL.md 複製到 .cursor/rules/
Gemini CLI:
gemini skills install https://github.com/addyosmani/agent-skills.git --path skills
也支援 Windsurf、OpenCode、GitHub Copilot、Kiro IDE。因為 skills 本質是純 Markdown,任何能讀 system prompt 的 agent 都可以用。
但
skill 的自動觸發在實務上並不總是順暢。
有使用者回報:即使安裝了 skill,agent 不一定會主動用它——例如要求「更新 process notes」,agent 會直接讀檔案更新,而不是走 process-notes skill 的完整 workflow。你往往需要明確說「用 /spec 做這件事」,而不是期待 agent 自己判斷「現在應該啟動哪個 skill」。
這不是 agent-skills 的設計缺陷,而是現階段 AI agent 的基本限制:它們的 meta-cognition 還不夠強,不會主動選擇約束自己。agent-skills 提供的是紀律框架,但你還是需要主動呼叫它。
這個工具對「知道自己需要紀律、並且願意主動用」的工程師有很大價值;對期待 agent 自動執行完整 SDLC 的人,期望要降溫。
三個工具的共同邏輯是一樣的:給 AI 更精確的上下文,它就不需要猜,猜錯的機率也就更低。TypeScript 型別是程式碼層面的上下文,Cursor Rules 是開發偏好的上下文,agent-skills 是開發流程的上下文。三層疊加,AI 幫你寫的程式碼才算真的能用。
利益揭露:本文部分連結為聯盟連結,點擊購買我會獲得回饋,不影響你的價格。